Last modified:
Prerequisites-
A basic system with site data already exists.
-
You activated the VCOM module Battery Monitoring for the specific system. See VCOM Battery Monitoring module. If your site only has an uninterruptible power supply (UPS, overall capacity < 30 kWh), you can proceed without activating the module.
-
At system level , go to


-
In the area Subsystems, select

-
A window with a step-by-step wizard appears.
-
Follow the steps of the wizard.
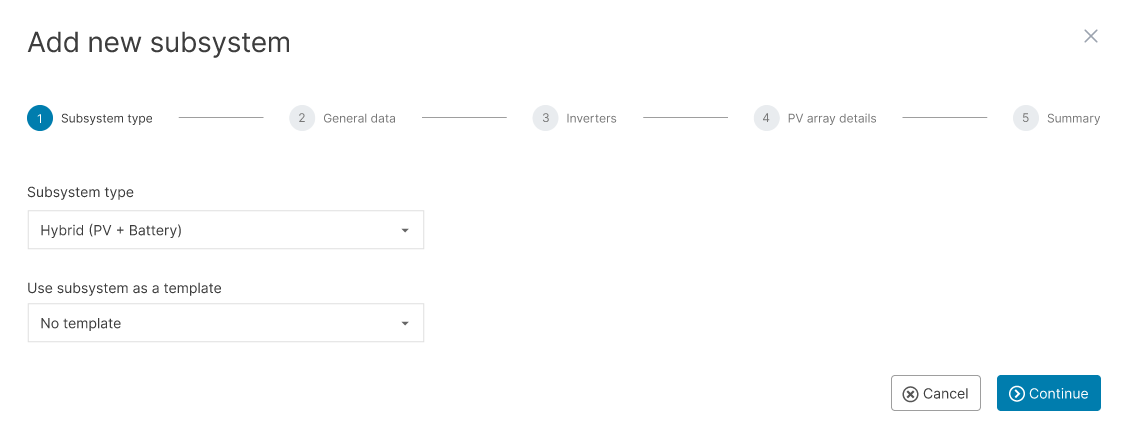
(1) Subsystem type
-
From the Subsystem type dropdown, select Hybrid (PV + Battery). The type refers to the inverter category used in the entire subsystem.
-
Optionally, Use a subsystem as a template: If, at a later stage, your system already has a subsystem of the type you have chosen, you will be able to select a previously added subsystem as a template. The data fields described below (except for title) will be pre-filled and you can edit them as needed.
(2) General data
-
Enter a Title for your subsystem.
Recommendation
Take notice of our Naming guideline when giving names and titles.
-
Enter the Date of installation of your subsystem.
(3) Inverters
Note
Each subsystem can only have one type of inverter, but it can have multiple inverters of the same type.
-
Select the Inverter manufacturer of all the inverters you want to specify with this subsystem. If you can not find the desired manufacturer, send a request to technics@meteocontrol.com including the manufacturer’s website or data sheet. We will get back to you with any further questions or let you know if we added it to the list.
-
When a manufacturer is selected, you can select the Inverter type.
-
If required, you are asked to enter the technical data of the hybrid inverter’s battery part. Refer to the manufacturer’s data sheet for the relevant information.
-
If you can not find your inverter type in the list, select
-
-
For the specific subsystem, enter the Number of inverters of the respective manufacturer and of the type you just specified.
-
In the area Battery details, enter the Battery capacity per inverter, which is the rated capacity at the beginning of life. Depending on the number of inverters in this subsystem or battery capacities already specified in other subsystems, the battery capacity of this subsystem and of the entire system is calculated. If you exceed the limit of 30 kWh and you can not save the subsystem later, check the prerequisites again.
(4) PV array details
Go through each maximum power point tracker (MPPT) and enter the specifications:
Note
The specifications for your MPPTs apply to all inverters of your subsystem. Enter the combined values of all inputs of the respective MPPT.
Note
Only the inverter’s MPPTs are listed in the sidebar of the wizard. The battery’s busbars are not displayed here, because you already specified their capacity in the previous step.
-
Select if the MPPT is Allocated or Not allocated.
-
Under Installation details, enter the Tilt of PV modules (inclination) and Orientation of PV system (azimuth), as well as the Type of installation. The orientation is the deviation from the north (clockwise). For example, orientation 0° means north, and 180° means south.
-
Under PV modules and circuitry, enter the Module manufacturer and Module type. If your module type is not in the list, select
-
Select the next MPPT from the sidebar. You can now use the data from MPPT 1 as a template for MPPT 2, MPPT 3, etc., and edit the details as needed. To do so, select

(5) Summary
-
Check the calculated PV values for the subsystem in the summary:
-
Total module area
-
Nominal power, which is calculated based on the nominal voltage and current of the modules and their total number.
-
-
Optionally, edit the module area and nominal power manually by overwriting the respective values, for example, if the subsystem has minimal deviations in the number of modules per string. The badge edited indicates manual changes.
Note: Virtual systems
If you edit the value and virtualize later, you must also edit the value in the recreated subsystem of the virtual system. See also Virtual system and Technical data for subsystems.
-
Select

The hybrid subsystem now appears in the Hybrid section of the Subsystems area. At system level in the Evaluation tab, the new section Battery storage appears. The default tab Battery is added to your system-level tabs.
-
Set up more subsystems in the same manner until you have specified all your system’s inverters, modules, or batteries.
-
Select


-
Battery monitoring module only Assign a battery unit to a battery inverter