Last modified:
As an O&M manager, you manage all work orders in VCOM:
-
Create work orders directly from a ticket, add details and forms, and assign technicians to carry out the work on-site.
-
Check the technicians' work results, create reports, and close the finished work orders or revert their status if the technician needs to rework some issues.
Create a work order and add details
Tip
To automatically create work orders for recurring events, such as regular inspections or mowing the lawn, see Automation with a recurring date.
As an O&M manager, you can create work orders directly from tickets. Add all the details and instructions the assigned technician needs, and send the digital work order directly to their O&M app.
Prerequisites-
The module VCOM CMMS is activated for the respective system. See Activate CMMS.
-
User group operations or higher
-
Create a work order.
-
Add details to the work order.
-
Finish work order creation and automatically send a notification to the assignee.
See detailed steps below:
1) Create a work order
-
You have three options to create a work order:
-
Within the Tickets portlet, select

-
Within the Tickets details portlet, go to the tab Work order and select

-
Within the Work orders portlet, select
-
-
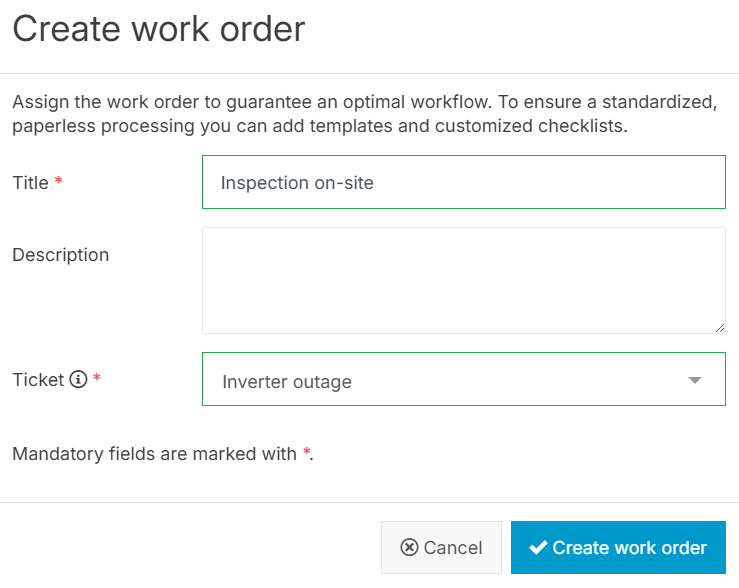
In the appearing window, give the work order a Title and add a Description if desired.
-
Only if you created the work order from within the Work orders portlet, you must link a Ticket here. If you chose one of the other two options, the respective ticket is already linked to the work order, and the ticket dropdown is not visible.
Note
The linked ticket is not visible to assigned technicians.
-
Select

A new window now appears where you can enter work order details.
2) Add details to the work order
Add work order details to provide structured information. The work order details are divided into five areas: General data, Assignees, Forms, Contacts, and Files.
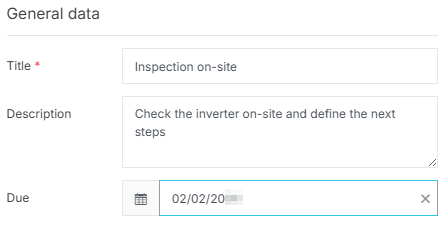
General data
-
Give the work order a Title and add a Description if desired.
-
Assign the Due date. This date must be in the future, so the technicians can independently plan multiple work orders.
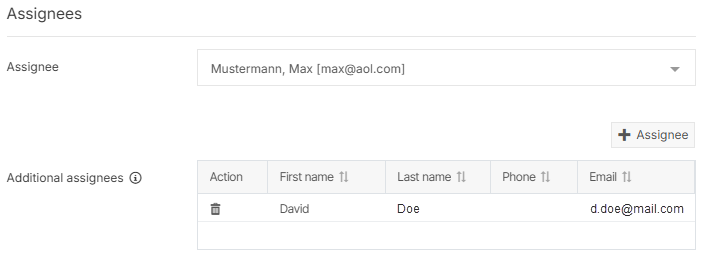
Assignees
-
From the dropdown, select a main Assignee for the work order.
-
If more than one technician should carry out the work order or you want to add a substitute in case of illness, select
Note
All assignees see the same information and have the same permissions in their O&M app.
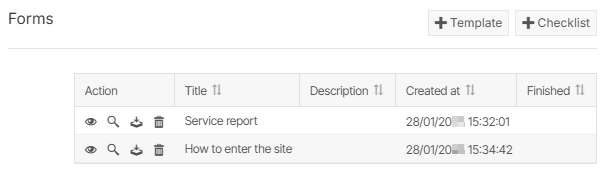
Forms
-
Select
-
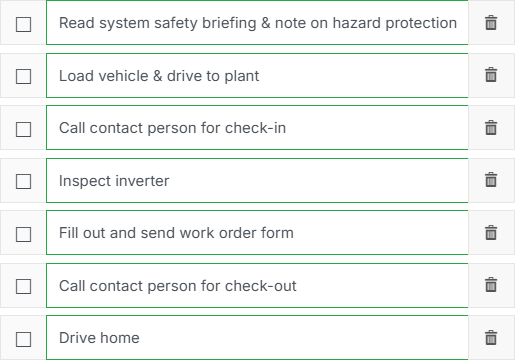
Sometimes a form is not necessary and a simple checklist is enough. Select
Recommendation
If system maintenance is carried out by external companies, it is especially useful to have a checklist in addition to a form. This helps you to define, for example, the site access and general work process in detail. The technicians can then go through and check off the individual items.
Contacts
-
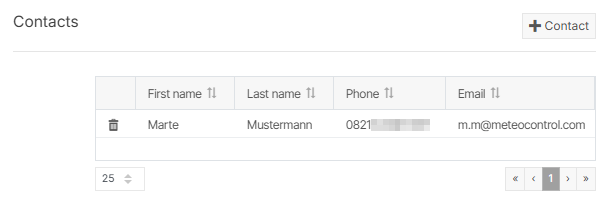
Select
-
Specify the function and role of the contact in the work order description or checklist described above.
Example
A useful contact could be the person who manages the check-in and check-out on site, or the O&M manager in charge of the ticket associated with the work order.
Files
-
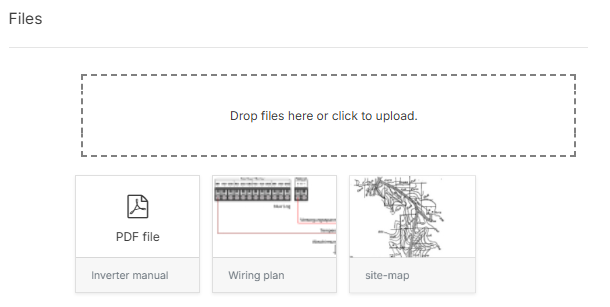
Upload files, such as manuals or wiring plans, that will be useful for the execution of the specific work order.
-
If you already uploaded general system files to your system master data, these files will also be visible here by default. For more information on the system master data, see System master data for CMMS work orders.
Note
You can upload a maximum of 10 files. File size is limited to 5 MB. Accepted file types: JPG, JPEG, PNG, PDF, XLSX, XLS, ODS.
3) Finish work order creation and automatically send a notification to the assignees
-
Select

The work order now appears in the Work orders portlet with the status Open. The main Assignee is marked with the ![]()
![]()
All assignees will be notified via email that a work order has been assigned to them. The work order will also appear in their O&M app, allowing them to carry it out on-site immediately. See also Work orders in the O&M app.
Keep track of the work order status
As the creator and owner of the work order, you keep track of the status of your work order in the Work orders portlet. You will also be informed about any status changes via email. The decision of one of the assignees changes the status of the whole work order.
The information in the Status column means the following:
-
Open: None of the assignees decided yet whether they can accept or must decline the work order.
-
Declined: One of the assignees declined the work order.
-
View the reason for rejection by right-clicking on the specific work order and selecting

-
You must select new assignees in the area Assignees.
-
-
In progress: One of the assignees accepted the work order.
Check results and close a work order
Note
You can close the work order immediately after creating it and at any time before the assignees mark it as done. However, the workflow below describes the more typical use case when the assignees carried out the work and marked the work order as done.
As soon as the assigned technicians mark the work order as done, its status changes to Done in the work orders portlet. You can then check the results of the service assignment, create a report, and close or reopen the work order.
Prerequisites-
The module VCOM CMMS is activated for the respective system. See Activate CMMS.
-
User group operations or higher
-
Navigate to the work order in the Work orders portlet.
-
Select
-
A window with the work order details appears. Select one of the following options:
-
Check results of the service assignment: In the Forms area, select

-
Check time: In the Cost and effort area, check for the time tracked on the work order. See also Time-tracking in VCOM.
-
Recommendation
The size of images is reduced within a work order. If the quality is insufficient for review, you can view the images in their original size at system level > Documents tab > Folders portlet > CMMS folder. Expand the view for the respective work order and find all corresponding documents and files there.
-
The next step depends on your evaluation of the results:
-
If you are satisfied with the result:
-
Create CMMS report: Select
-
Close work order: Select
-
-
If the result is unsatisfying or missing some steps:
-
Reopen the work order: Allow the assignees to complete the missing steps. See Reopen a work order that was marked as done.
-
-
Revert work order status
You may find the results of a finished work order insufficient or notice missing steps after the work order has already been closed. In such cases, you can revert the status to make corrections.
Prerequisites-
The module VCOM CMMS is activated for the respective system. See Activate CMMS.
-
User group operations or higher
Reset a closed work order
It is possible to reset the status of a work order even after you already closed it in VCOM.
Steps-
Navigate to the Work orders portlet. You may use the Status filter to find Closed work orders.
-
Right-click on the work order to open the context menu. Select
-
Select
-
The work order status is reverted to Done and you can make your adjustments.
-
You can also revert the status of the work order back to Open. For this, select

Reopen a work order that was marked as done
It is possible to reopen a work order after the assignees marked it as done.
Steps-
Navigate to the respective work order in the Work orders portlet. You may use the Status filter to find work orders with the status Done.
-
Right-click on the work order to open the context menu. Select
-
Select
-
The work order status is reverted to Open.
-
After you select