.svg)
Last modified:
Set up a Solar-Log data logger
General tips
-
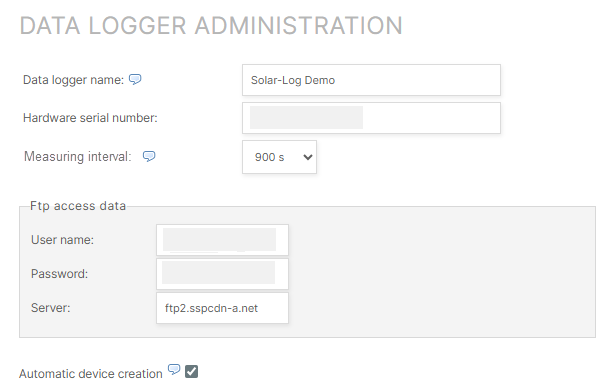
Have the data source (data logger, etc.) serial number on hand. When entering the serial number, pay attention to uppercase and lowercase letters and empty spaces.
-
The data source name can be freely selected. For recommendations, see our Naming guideline.
-
If possible, use data sources that support the same Measuring interval or align the intervals. Otherwise minor features may not work properly.
-
We strongly recommend ticking the check box Automatic device creation to ensure that VCOM automatically creates any new devices found during each data import.
-
If possible, perform a connection test once you have completed the configuration in both VCOM and the data source.
Data loggers only
-
For data loggers, update the firmware to the latest version prior to configuration.
-
For data loggers, any import that uses FTP can also use SFTP. The access data, such as the FTP server address, user name, and password remain identical. Only the port changes from port 21 (FTP) to port 2222 (SFTP).
APIs only
-
If you experience import issues with the API, please contact the respective API provider first.
-
Each day at midnight, VCOM checks for complete data and requests data from the past 7 days. If there are no limitations from the API and the data is available, the gaps will be filled.
Configuration details
|
Protocol |
FTP |
|---|---|
|
File format |
Solar-Log & CSV |
|
Measuring interval |
5/10/15 min |
|
Server |
|
|
Port |
21 |
|
Serial number |
Found on the data logger under Diagnosis > Support > General 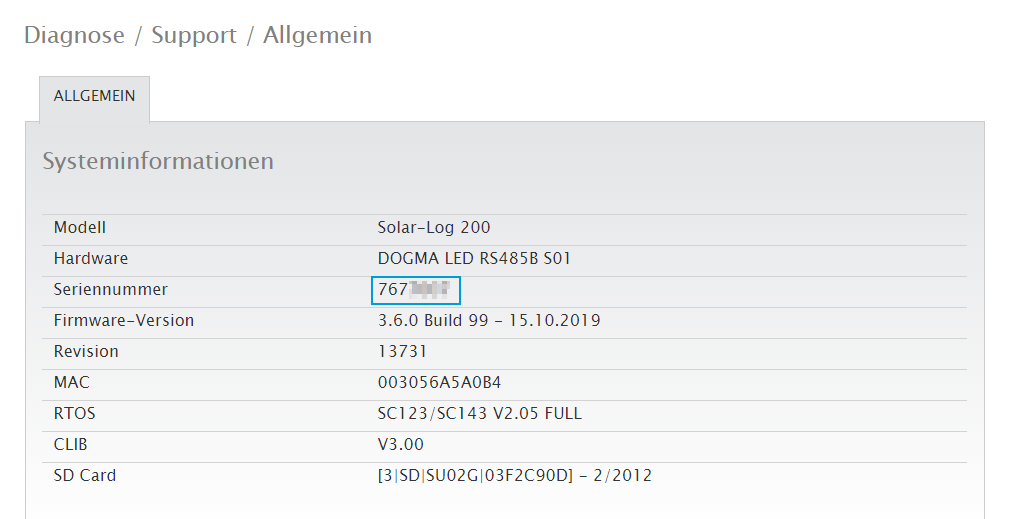
|
Configuration: Data logger
-
Enter the FTP access data under Configuration > Internet > Export. Pay attention to upper and lower case.
-
Leave FTP Directory blank
-
Set the Data format to Solar-Log & CSV.
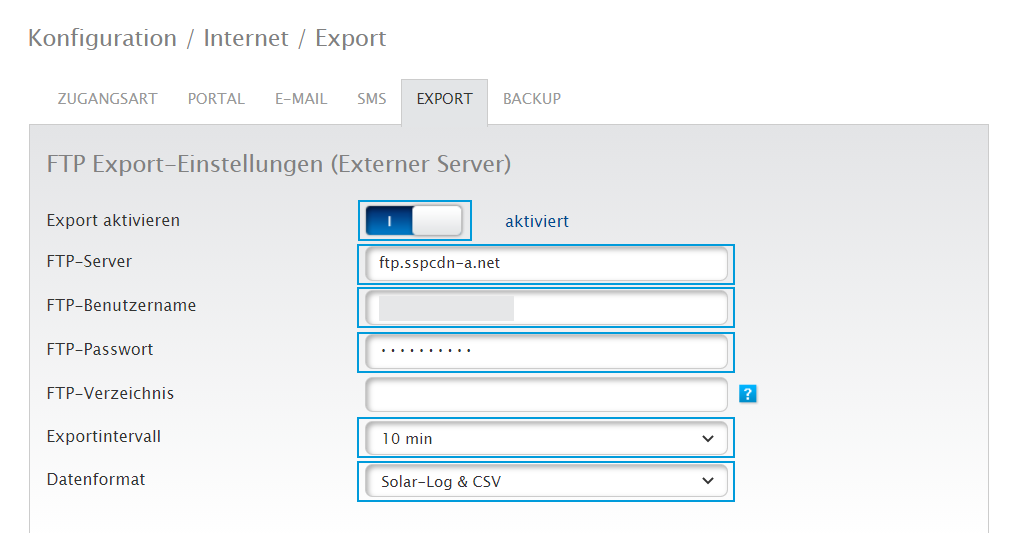
Solar-Log: export settings -
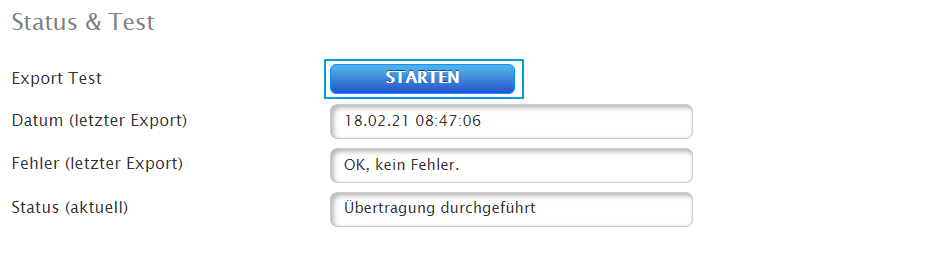
Select the Start button to perform a connection test.
-
Ensure that the System date and time have been set correctly.
Configuration: VCOM
Prerequisites
-
User group technical customer or higher
Steps
-
At system level , go to


-
Under New source of type, select Solar-Log as the data source type from the dropdown.
-
Select Add.
-
Enter the Data logger name, Hardware serial number, and Measuring interval.
-
Select Register new data logger.
-
New fields appear. Enter the FTP User name, Password, and Server.
-
Select Save settings.
The data logger is set up.