.svg)
Last modified:
Create a user-defined tab at portfolio level
Prerequisites
-
None
Steps
-
At portfolio level , select


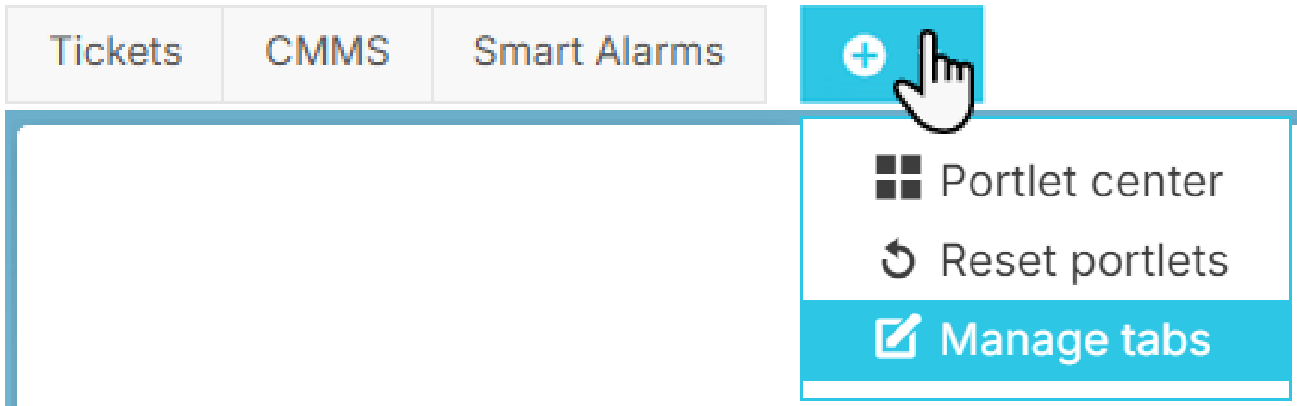
-
In the appearing window, give the new tab a Tab name and select

-
Optionally, also create a subpage for the tab:
-
Give it a Page name.
-
Select the desired parent tab from the dropdown. You can only select user-defined tabs to be the parent tab.
-
Select the other
-
-
Optionally, rearrange the order and hierarchy of tabs and subpages by dragging and dropping their names accordingly.
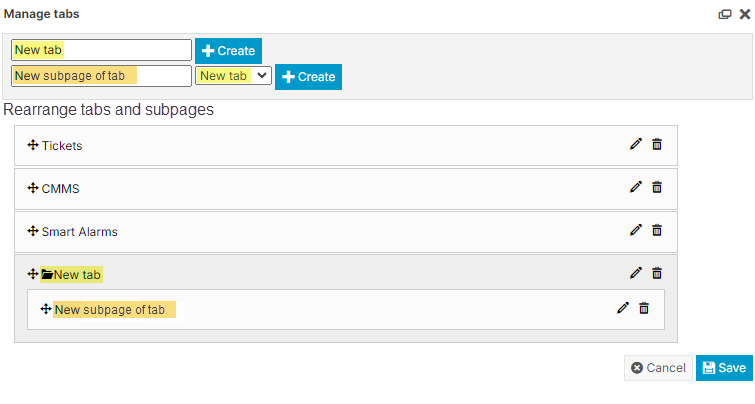
-
Select


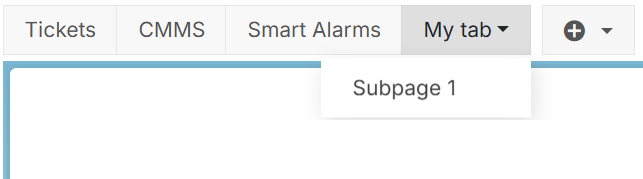
The new tab and subpage appear at the Portfolio level .
Example
My tab tab with the sub-page Subpage 1.
Further actions
-
Add portlets to the new tab and subfolder.
Create a user-defined tab at system level
Note
-
You can only create a total of user-defined 10 tabs.
-
You can not change the order of the tabs.
Prerequisites
-
None
Steps
-
At System level , select
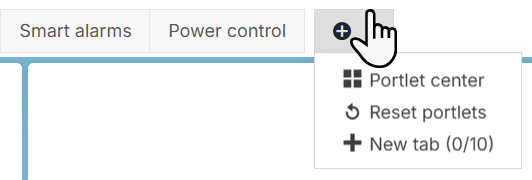
-
Give your tab a name and press
Enter. Tab names do not have to be unique.
Your new tab appears in the tab bar. Open it by selecting its name. It will be empty at first.
Further actions
-
Add portlets to your tab to create meaningful dashboards.
-
Delete a tab by hovering over it >


-
Rename a tab by hovering over it >
Examples
Sending system-level tabs to others
When you have created a meaningful dashboard (= user-defined tab + portlets) at system level, you might want to share your composition with other users in your organization. This way, not everyone has to create the same dashboard for the same system over and over again.
General functioning of sent tabs
-
Tabs are sent as copies. This means once a tab is sent, changes in the original are not applied to previously sent copies. And also, changes in the copies do not reflect in the original.
-
Since a user can have only 10 user-defined tabs, those who have already reached that maximum can not receive the tab when you send it.
-
If some receiving users do not have the necessary permissions to display certain portlets in the tab, the corresponding area will remain empty for them.
-
The receiving user can not refuse to receive a tab. But they can delete it afterwards.
Send your system-level tab to other users
Prerequisites
-
You have created a user-defined tab (and added relevant portlets)
-
Ensure that the users you want to send the tab to have sufficient user permissions to view the portlets it contains. See also User group modules and permissions.
Steps
-
At System level , hover over the user-defined tab you want to send to others.
-
Select

-
In the appearing window, select the users who should receive the tab. Only users of your organization with access to this system are listed. You can also search for a specific user or filter the list by User group here.
Note on Shared Assets
There are no users listed who have gained access to that system via Shared Assets.
-
Select
-
You are informed about who received your tab and who did not. This is the only time you see this information. After closing the window, you will not be able to check anywhere to see who you sent the tab to.
For the selected users, your tab appears at their system level, and they can modify it if their user group allows it. Initially, the tab is marked with a Sent badge that disappears when they first select the tab. The receiving user can always hover over the tab and see who sent it and when it was received. Users who already have the maximum number of 10 user-defined tabs will not receive your tab.
Manage tabs for others
Impersonate a user to configure their dashboards before they activate their account and sign in for the first time. See Impersonate a pending user (mc Cloud documentation).