Set up a new system
Overview
This topic is intended for partner admins responsible for setting up a new system (=plant) in VCOM.
Prerequisites
VCOM account and admin permissions, see User groups.
In-depth knowledge about the specific components of your system
Recommendation
Take notice of our Naming guideline when giving titles to your system components.
Prepare data
Before setting up a new system, we recommend collecting all the required information from designs, diagrams, manufacturer data sheets, and other relevant sources specific to your site and its components.
Once you have collected the required information, navigate to System administration > New system. As a rule, we recommend following the steps from the top (Installation and site) to the bottom (System structure). However, this may not always be possible. You can exit the configuration and return to it at any time.
Note
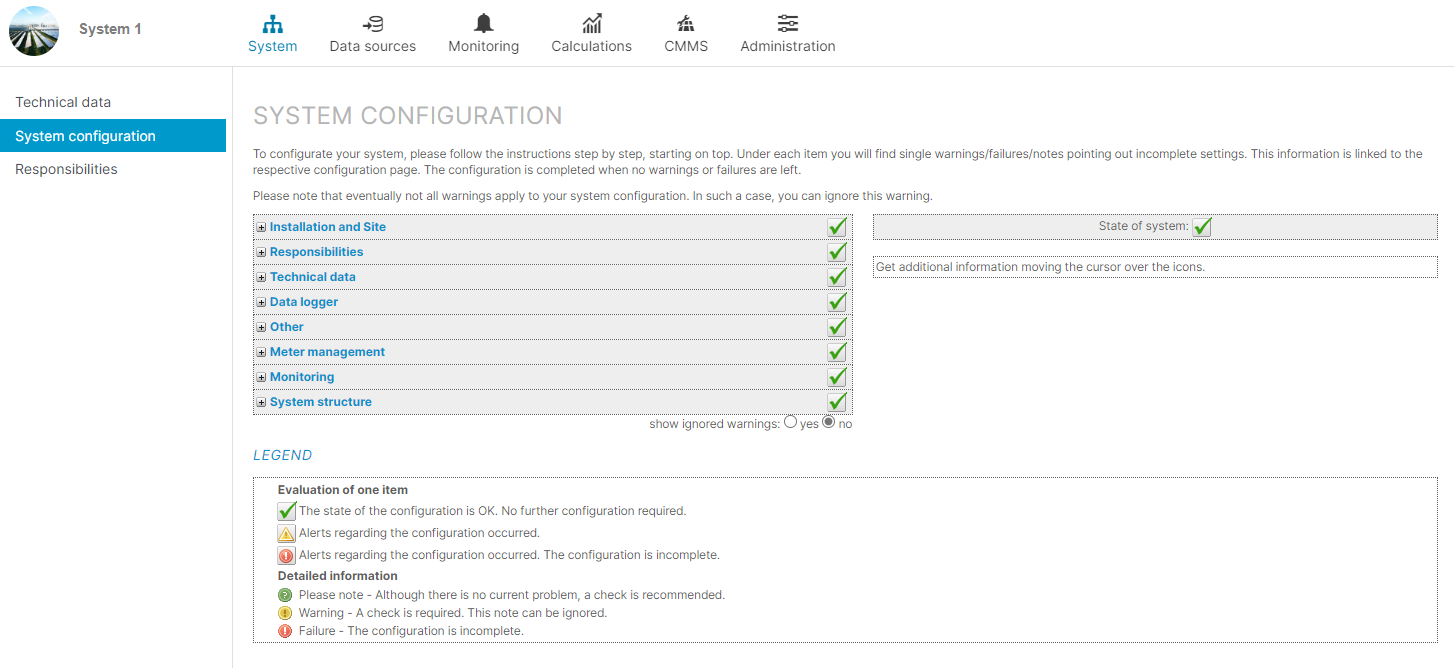
A green check mark  indicates that all fields have been completed for each step. To ignore the step and set the check mark anyway, select Ignore.
Once all required fields are filled in, the System configuration overview will be displayed automatically.

System configuration overview
Installation and site
The built-in feature based on satellite data helps you to automatically determine longitude, latitude, and altitude.
Select the system type
PV system: Default option.
Virtual PV system: Combine several systems into one or divide a system into several virtual systems
System without measurement system: Select this option if your system does not import data from a data logger or equivalent source (PLC, API, ...).
CO2 emission factor: The standard emission factor is 0.596 kg/kWh, but you can enter a different value if desired. This is useful for calculating your CO2 savings. See also Savings CO2 equivalent portlet.
Additional information: Other relevant information, for example a mailing address.
Note
Later you can find and edit your installation and site data in the System data section under Technical data in the sidebar. See also Technical data.
Responsibilities
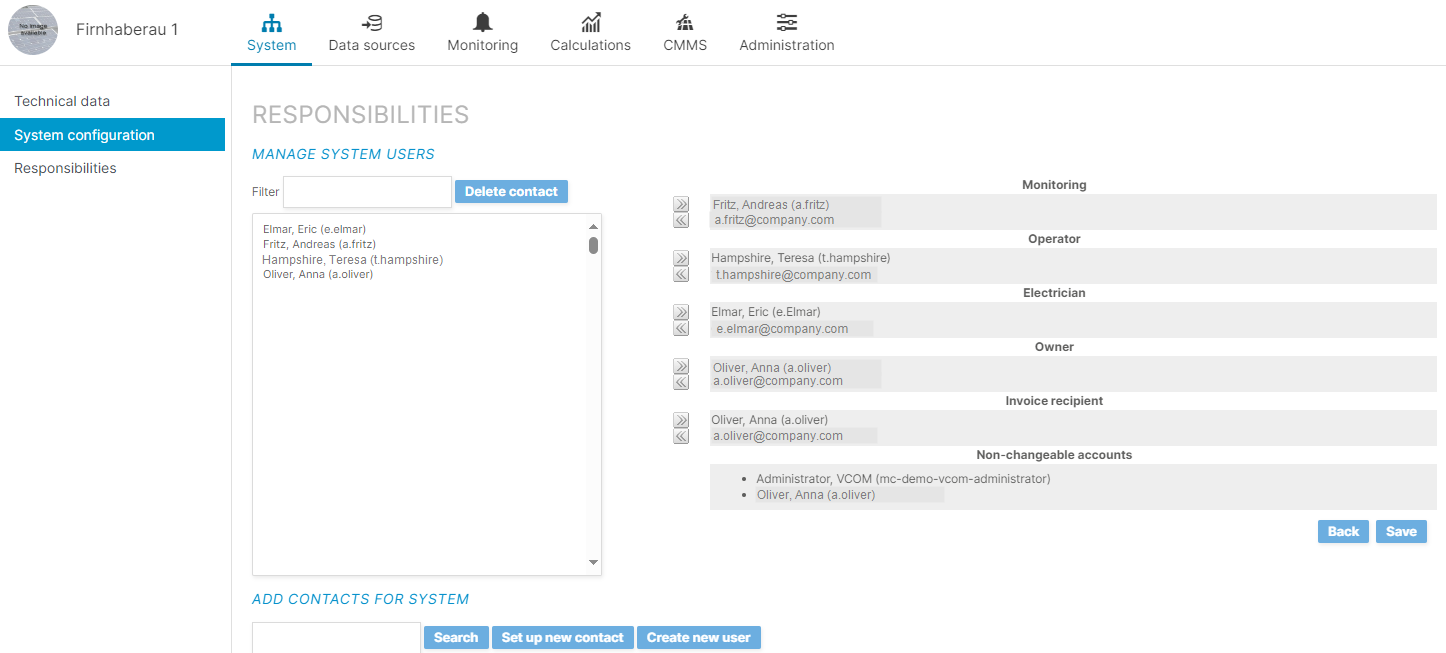
Assign contacts for the various responsibilities:
If you have already set up users and contacts: Assign existing users or contacts to responsibilities via the arrow button.
If you have not set up users and contacts: Set up new users and contacts via Set up new contact or Create new user.
For more information on users and contacts, see Users and contacts.

Assign users or contacts to responsibilities
Technical data
A subsystem is a group of PV modules configured with distinct characteristics such as different orientations, physical locations, or electrical configurations. Each subsystem operates independently but can be grouped within a single system in VCOM.
General system data
Enter a title for your system.
Recommendation
Take notice of our Naming guideline when giving titles.
If you use a tracking system (solar tracker), select the type.
Inverter details
If you cannot find your inverter type on the list, select Create inverter type.
If required, refer to the manufacturer data sheet for details.
PV array details
The required details here depend on:
Inverter type (e.g. central inverter or string inverter) and number of MPPTs.
Whether the PV modules of your subsystems have complex roof layouts, shading, or panels facing different directions.
Steps
Under Installation details, enter the tilt (inclination) and orientation of the modules, and the type of installation. The orientation is the deviation from the north (clockwise). For example, orientation 0° means north and 180° means south.
Under Modules and circuitry details, enter the number of strings, modules per string, and module type. If your module type is not in the list, select Create module type. Refer to the manufacturer data sheet for the relevant information.
Depending on your inverter type, you may have several Input (MPPT) tabs. Once you have filled out Input 1, you can use that data as a template for Input 2, Input 3, etc., and edit the details as needed. For this, select Accept data from input 1.
When you have filled in all the inputs, you can view all the values of the subsystem under the Summary tab. If you manually change the Nominal power or Surface area fields, the check mark next to Manual correction will be automatically activated.
Note
If you exit the configuration and return to it later, select Technical data > Overall view to view all your subsystems.
Use an existing subsystem as a template for additional subsystems
Once you have entered a subsystem, you can use it as a template for additional subsystems and adapt the details as needed.
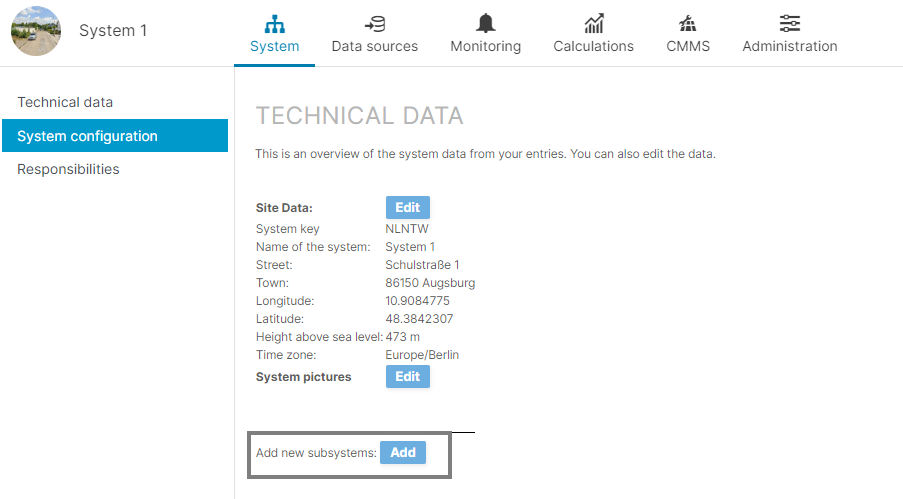
Under System configuration > Technical data, select Add.
Under Template, select the subsystem you want to use as a template and select Continue.
Edit the data as needed and select Continue.
The new subsystem will be added to the list under Technical data.

Add new subsystem
Data logger
In addition to the blue’Log XM/XC from meteocontrol, you can add data loggers from many different manufacturers. Alternatively, you can import data via manufacturer APIs or predefined imports.
For a blue’Log, follow the steps under Data sources / data logger. In addition, we recommend activating the Support access toggle (see Users) on your blue’Log if you have not already done so.
Once you have added the data logger, close the configuration window and reopen it. The data logger and all connected devices should appear under System configuration > Data sources > Data logger overview.
Note
The items displayed under Data logger overview will vary depending on your data source.
Inverter
See Inverters
Current sensors
To ensure the alarms work properly, assign the correct scale factor in kW to each subsystem via the Magnifying glass icon.

Assign scale factor to string combiner box sensors
Other devices
See Other devices
Digital signals/inputs
You can configure error states (0 or 1), e.g. fault messages, under Digital signals. If you have not manually set the error state, it will be displayed as 0.
String inverters and stringboxes
It is also possible to configure string inverters and stringboxes (string combiner boxes) if these are included in your imported data.
Other (terms)
Any additional settings required by your system will appear here, for example Terms.
Warning
The terms E_Z_EVU and G_M0 are required for your system setup. Without them, many calculations and charts will not be displayed.
Meter
For a blue’Log: Once you have finished setting up your blue’Log in VCOM, the data from your yield meter is automatically imported. We recommend double-checking the following under System > System configuration > Meter management > Edit meter:
Measured value assigned: In general, you should select the term E_Z_EVU. See also Terms
Installation date: when the data logger was commissioned
For a different data logger: The data may not be automatically imported if your data logger does not deliver data (check the manufacturer data sheet for information). In this case, you can manually add a meter.
Monitoring
Before setting up your alarms, ensure no issues appear under System structure. Then set up your alarms as described under Smart alarms.
System structure
If there are any issues with your configuration, they will be displayed here.
Examples of system configuration issues
You need to check the assignment of inverters to subsystems
You need to check that the proper scale factor is set for inverters
If there are no system configuration issues anymore green check marks  should appear next to all items under System configuration.
Next steps
Configure alarms and alarm notifications. See Smart alarms
Check/configure terms. See Terms
Set up the power flow chart. See Power control tab
Set up self-consumption. See Self-consumption and Self-consumption chart
Delete a system. See Delete a system
.png)