Inverters
View and edit the inverters connected to your system and data logger at the system level under Data sources > Inverter, Depending on your data logger type, this will look slightly different than in the example below:
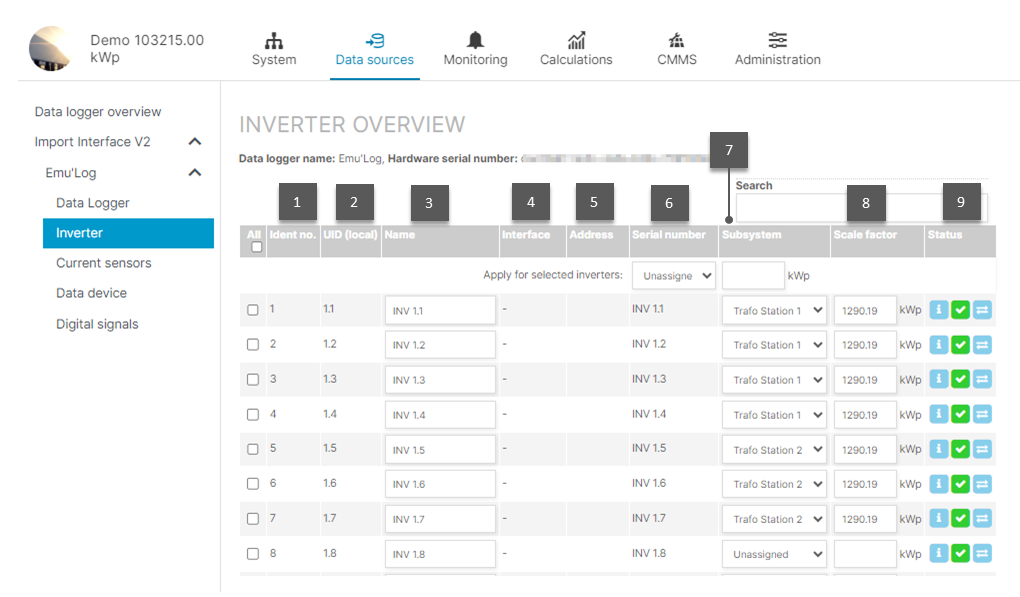
Inverter overview
Item | Name | Details |
|---|---|---|
1 | Ident no. | Automatically assgined by VCOM. Read-only |
2 | UID (local) | External identification of the inverter, typically the same as the serial number. If there is no serial number available, it is a text string created from the interface and/or the address. Read-only |
3 | Name | Automatically assigned based on the information from the data logger. You can edit the inverter name here. If using a blue’Log, you can change the name via the blue’Log web interface. |
4 | Interface | Interface to which the inverter is attached. For the blue’Log, this might be a built-in RS-485 ports or an add-on module. For inverters connected via Ethernet, this will contain the network interface of the blue’Log. Read-only |
5 | Address | Address of the inverter on the RS-485 bus or the Ethernet IP address of the inverter. Read-only |
6 | Serial number | Serial number is read from the inverter. If you are not using a blue’Log, you may need to edit this field. |
7 | Subsystem | You can assign the inverter to a subsystem here. |
8 | Scale factor | Normalizing factor in kWp. This field is typically auto-filled when you select the subsystem. Otherwise, you can enter the data manually. This value is used for inverter monitoring and the Inverter energy (normalized) chart |
9 | Status |
|
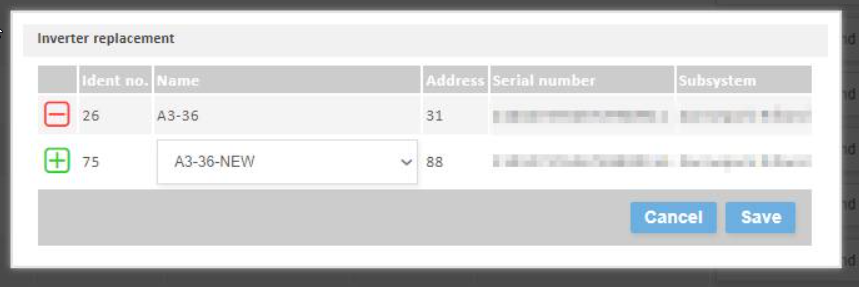
Exchange inverters
When your system has faulty inverters, you may have to exchange them.
Note
Carry out the exchange first before saving the configuration page. Otherwise, the status of the new inverter is set from new to active and the exchange option is no longer available.
Prerequisites
You have already exchanged the inverter on-site
The new inverter has been found on your data logger via a scan
You have deleted the old inverter from your data logger
Steps
At the system level, go to Data sources > Inverter > Exchange inverter.
Select Save.
The new inverter will appear in the inverter overview.