
Last modified:
About cashflow tracking
Cashflow tracking focuses on the actual cashflow of your assets, meaning the money that has already been paid or received and is reflected in your bank accounts. To enable meaningful comparisons between actual and predicted financial performance, cashflow transactions use the same categories as financial models and forecasts. These categories are taken from the invoices that are mapped to the transactions.
Track your cashflow
The typical cashflow tracking workflow consists of three steps.
-
Create invoice documents and assign them to the appropriate category.
-
Import cashflow transactions to record all incoming and outgoing payments.
-
Map transactions to invoices so that transactions inherit the category of the associated invoice.
Note
If you decide to import your transactions via bank sync, you only must carry out step 1 and step 3 on a regular basis.
1 ) Create invoice documents
See Creating documents.
2) Import cashflow transactions
To use and evaluate cashflows in the portal, you have to import these transactions to the platform. You can do that manually by uploading CSV files regularly, or you sync your bank accounts with the corresponding assets, and all transactions will be imported automatically.
All cashflow transactions must have the following attributes:
-
Date,
-
Purpose,
-
Amount (including currency),
-
Bank account (including bank name),
-
and after mapping them to an invoice, they also have a category. See Map transactions to invoices.
A) Import manually via CSV file upload
You can manually import cash flow transactions at asset level by uploading a CSV file. To do this, the file must be in a specific format so that the columns can be mapped to the system columns containing the transaction attributes. The system also checks for duplicates before importing the data.
Caution
If you decide to import your transactions manually, you should do so regularly to ensure the accuracy of your financial forecasts.
Prerequisites
-
You are the organization owner, an admin, or a member of all domains or the finance domains. See User groups and permissions.
-
The records in your CSV file correspond to the following requirements:
-
Comma-separated values
-
Currency code is listed in ISO 4217
-
Example
09/26/2023,SolarBank,DE98123456780001122334,Einspeisevergütung,2000,EUR
Sample file
MockbankImportDEMO.csv
Steps
-
Navigate to the asset level at which you want to import transactions.
-
Select the domain

-
Select

-
After the upload, the system scans your file for matching columns and duplicate transactions.
-
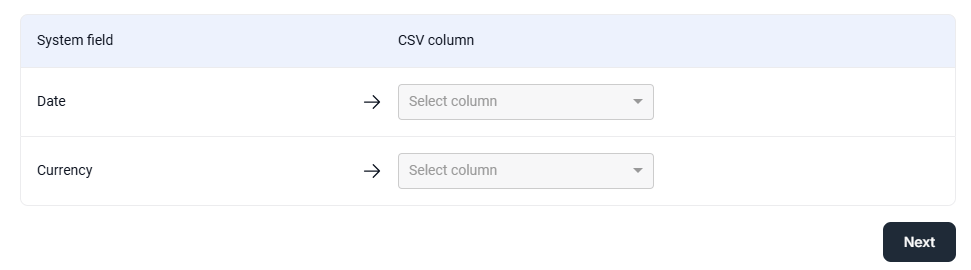
Match columns: The system automatically matches your data to the transactions' attributes. If some of your data could not be matched to an attribute, you must match this column manually to the respective System field (= transaction attribute). To do so, select the column of your CSV file to match the missing system field. Then select Next.
-
Match formats: For the Date and Amount, select the respective format that is used in your file. Then select Next.
-
Review table: On the last page, a table with all the matching data is displayed.
-
Duplicate check: The system checks your file for duplicate transactions. A transaction is considered a duplicate if there is already a transaction with exactly the same attributes somewhere in your organization. Duplicates will be grayed out in the import preview list. In the column Organizational level, you can see at which asset level the original to your duplicate was found. If no duplicates were found in your import file, this column is empty.
-
Select Finish when you have reviewed the table.
-
The transactions are now imported and displayed under Unmapped transactions.
Caution
Duplicate transactions are not imported.
B) Import automatically via Bank syncs
You must sync a bank account in the administration settings to automatically import cashflow transactions. See Bank syncs.
3) Mapping transactions to invoices and categories
All transactions, whether from an imported CSV file or a bank sync, first appear under Unmapped transactions in the
Caution
Unmapped transactions can not be taken into account in financial analyses, as many of the underlying calculations rely on categories.
Mapping relations between transactions and invoices
Full payment
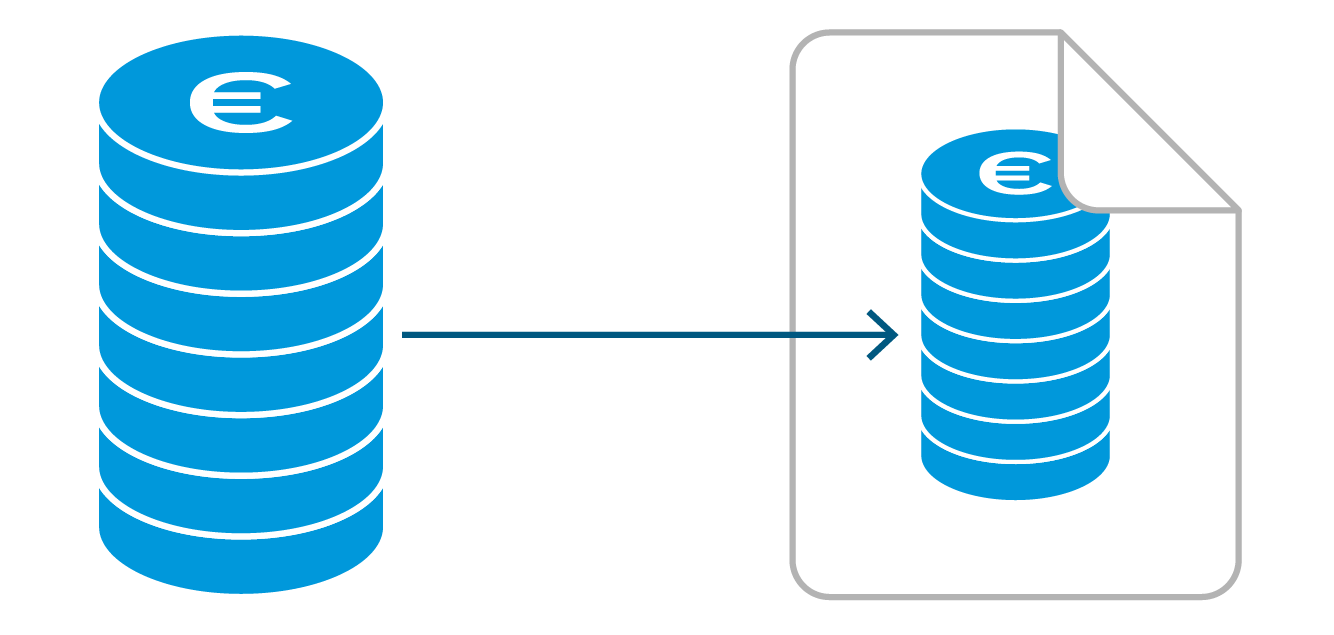
A full payment relationship exists when a single transaction settles the full amount of a single invoice. The invoice gets the Status Paid once the transaction is mapped to the invoice.
Partial payment
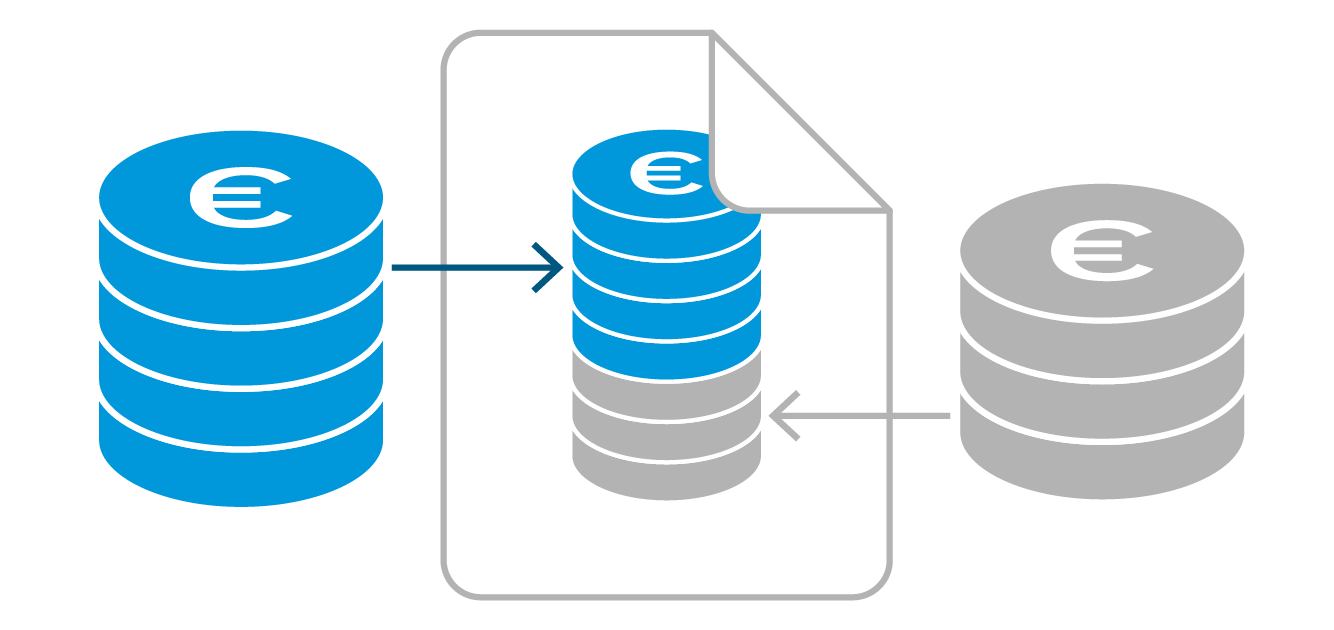
A partial payment relationship exists when a transaction covers only part of an invoice amount. The invoice gets the Status Partially paid once transactions are mapped and the full amount is not yet settled. Partially paid invoices always have a remaining balance.
Multiple transactions can be mapped to the same invoice until the invoice has been paid in full. It then gets the Status Paid .
Multi-invoice payment
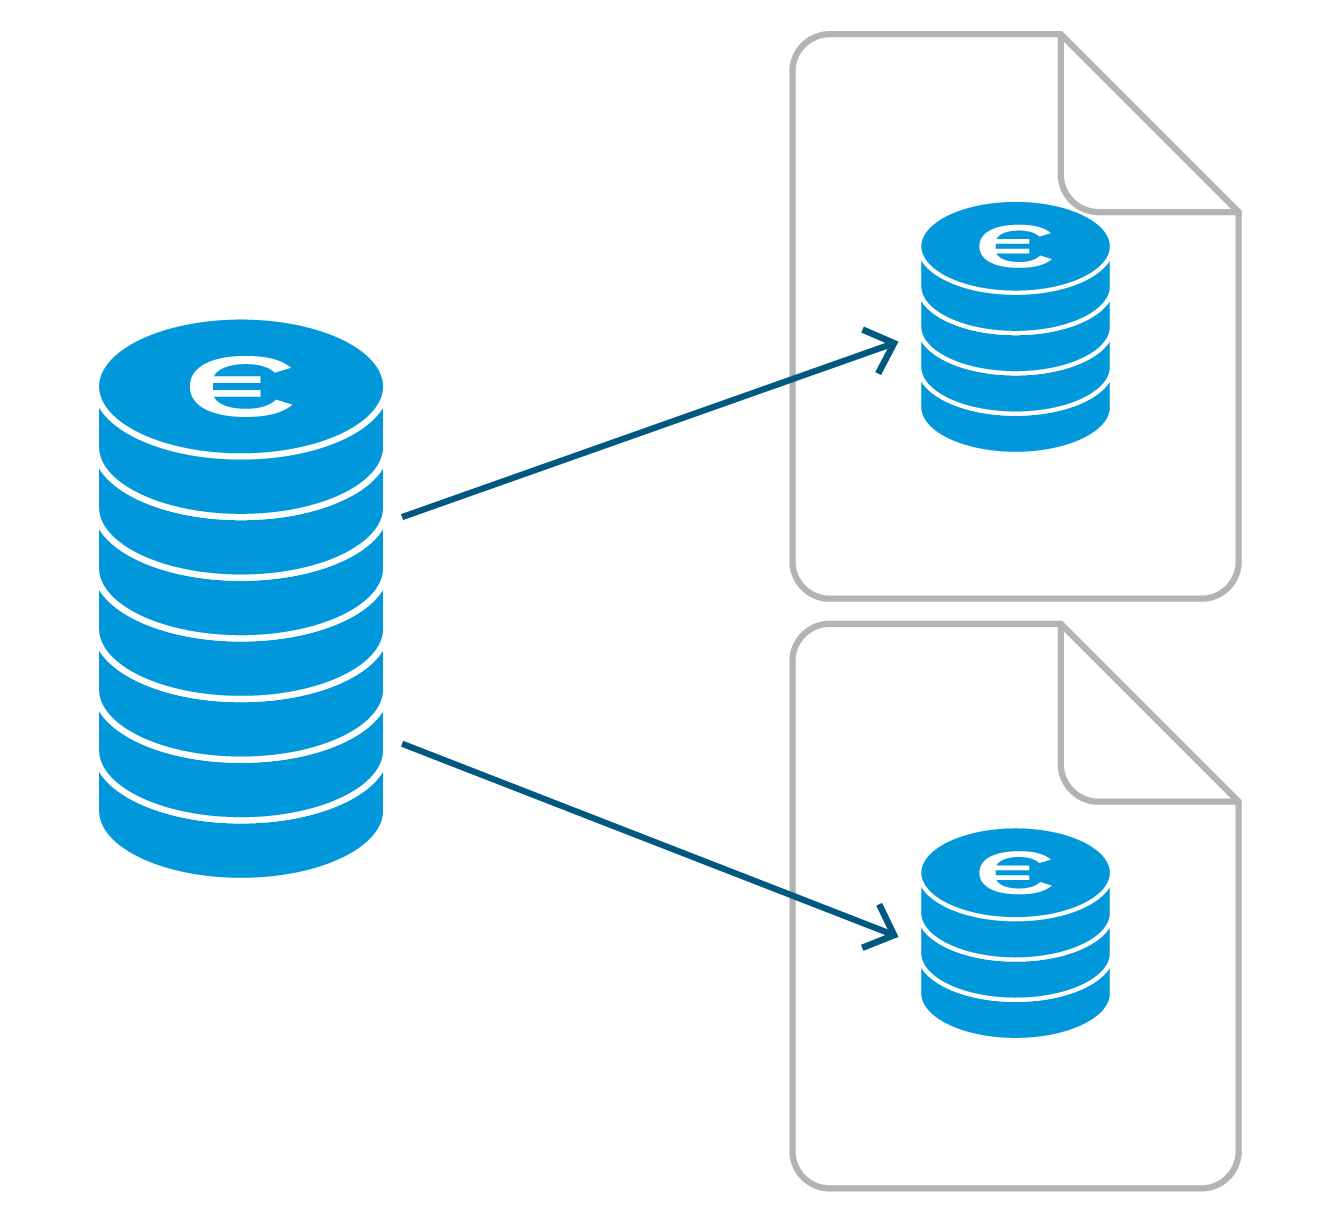
A multi-invoice payment relationship exists when a single transaction covers multiple invoices. In this case, the transaction amount is allocated across the related invoices according to the respective payment amounts. All invoices then have the Status Paid .
Note
In the case of multi-invoice relationships, all invoices must have the same category so that the transaction also has only one category.
Workflow
Prerequisites
-
You are the organization owner, an admin, or a member of all domains or the finance domains. See User groups and permissions.
-
The invoice that you want to map the transaction to must already exists as document in the portal. See step 1) of this process.
Steps
-
Navigate to the asset level at which you want to map a transaction.
-
Select the domain
-
Open the mapping window:
-
A) For a single transaction: Select the button in the Invoice column.
-
B) For multiple transactions at once: Tick the respective


-
-
Select whether the transaction is a Full payment, a Partial payment, or a Multi-invoice payment. See also Mapping relations between transactions and invoices.
-
Select the corresponding Invoice. Invoices with the status Draft , Paid , Voided are not available for mapping. The dropdown is further filtered depending on the selected mapping relation:
-
Full payment: Only invoices with the exact same amount as the transaction are listed.
-
Partial payment: Only invoices whose amount or remaining balance is greater than the transaction amount are listed.
-
Multi-invoice payment: Only invoices whose amount is less than the transaction amount are listed. If the transaction has already been mapped to an invoice, only invoices with the same category are listed.
-
-
Select Map.
Your transaction(s) are now mapped. They are automatically transferred to the tab Mapped transactions. You can see the mapped Invoice and the inherited Category in the respective table column. The status of the invoice changes accordingly. See Invoices statuses.
Further actions
-
Unmap an invoice from a transaction by selecting
