Last modified:
Prerequisites
-
In order to start up the bluelog, the device must be securely mounted, and all cables must be properly connected.
Notice
A damaged device must not be put into operation!
Connect the network and devices
Connect bluelog to your network
-
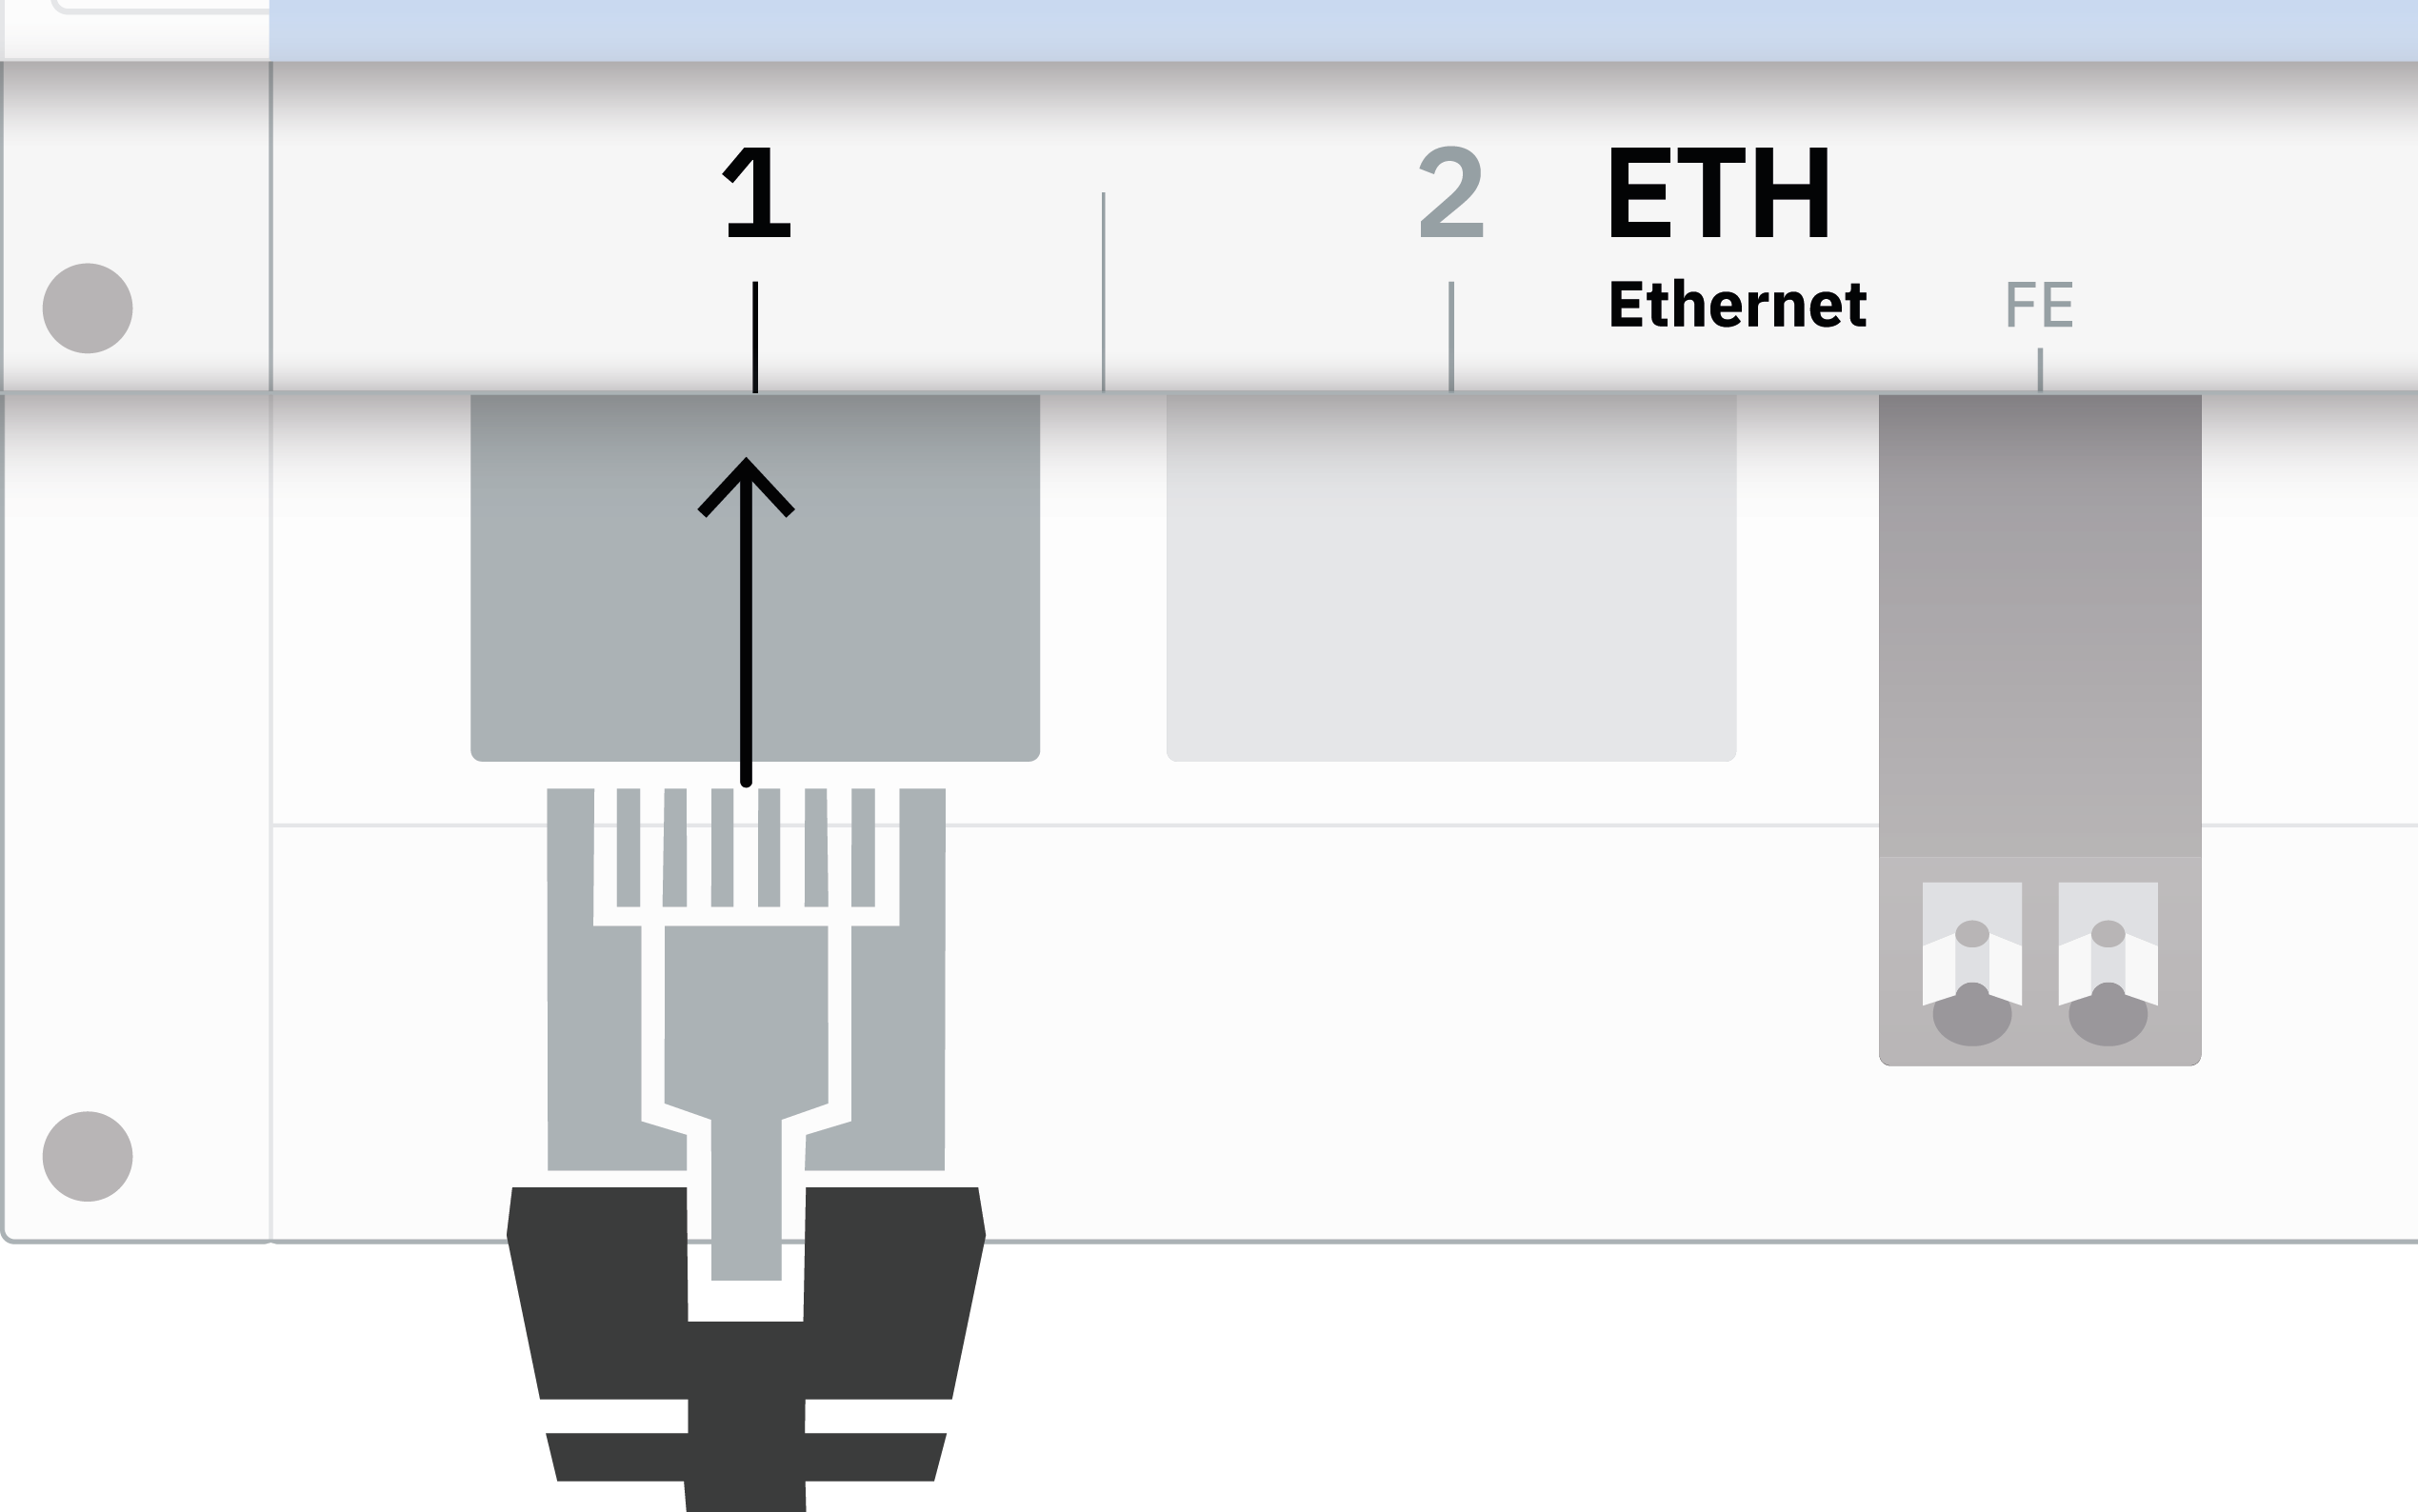
Connect one end of the enclosed Ethernet patch cable to a LAN network, for example, router, LAN interface PC, or switch.
-
Connect the other end of the cable to the ETH-1 port.
Connect devices
Caution
Applying impermissible signals and signal strengths to the bluelog and its add-on modules may cause damage to them.
-
Check if your devices are compatible. See bluelog compatibility check.
-
Connect your devices according to the respective plan. See Device connection plans.
Supply power
Caution
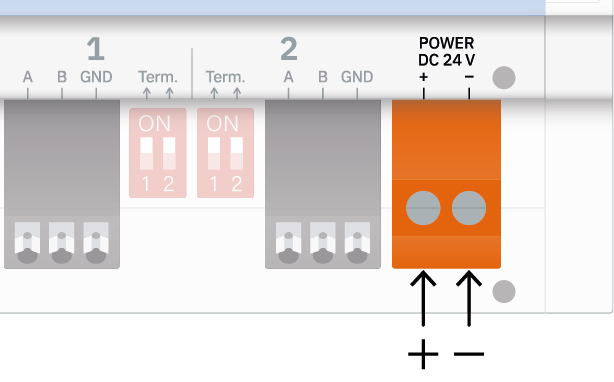
Failure to observe the correct polarity (+/-) may cause damage to the bluelog. Use an energy-limited circuit or a DC power source with limited power. The power supply must comply with the following specifications:
-
Voltage: 24 V DC (+/- 10%)
-
Power: max. 80 W
-
Connect the power supply with the Power port.
-
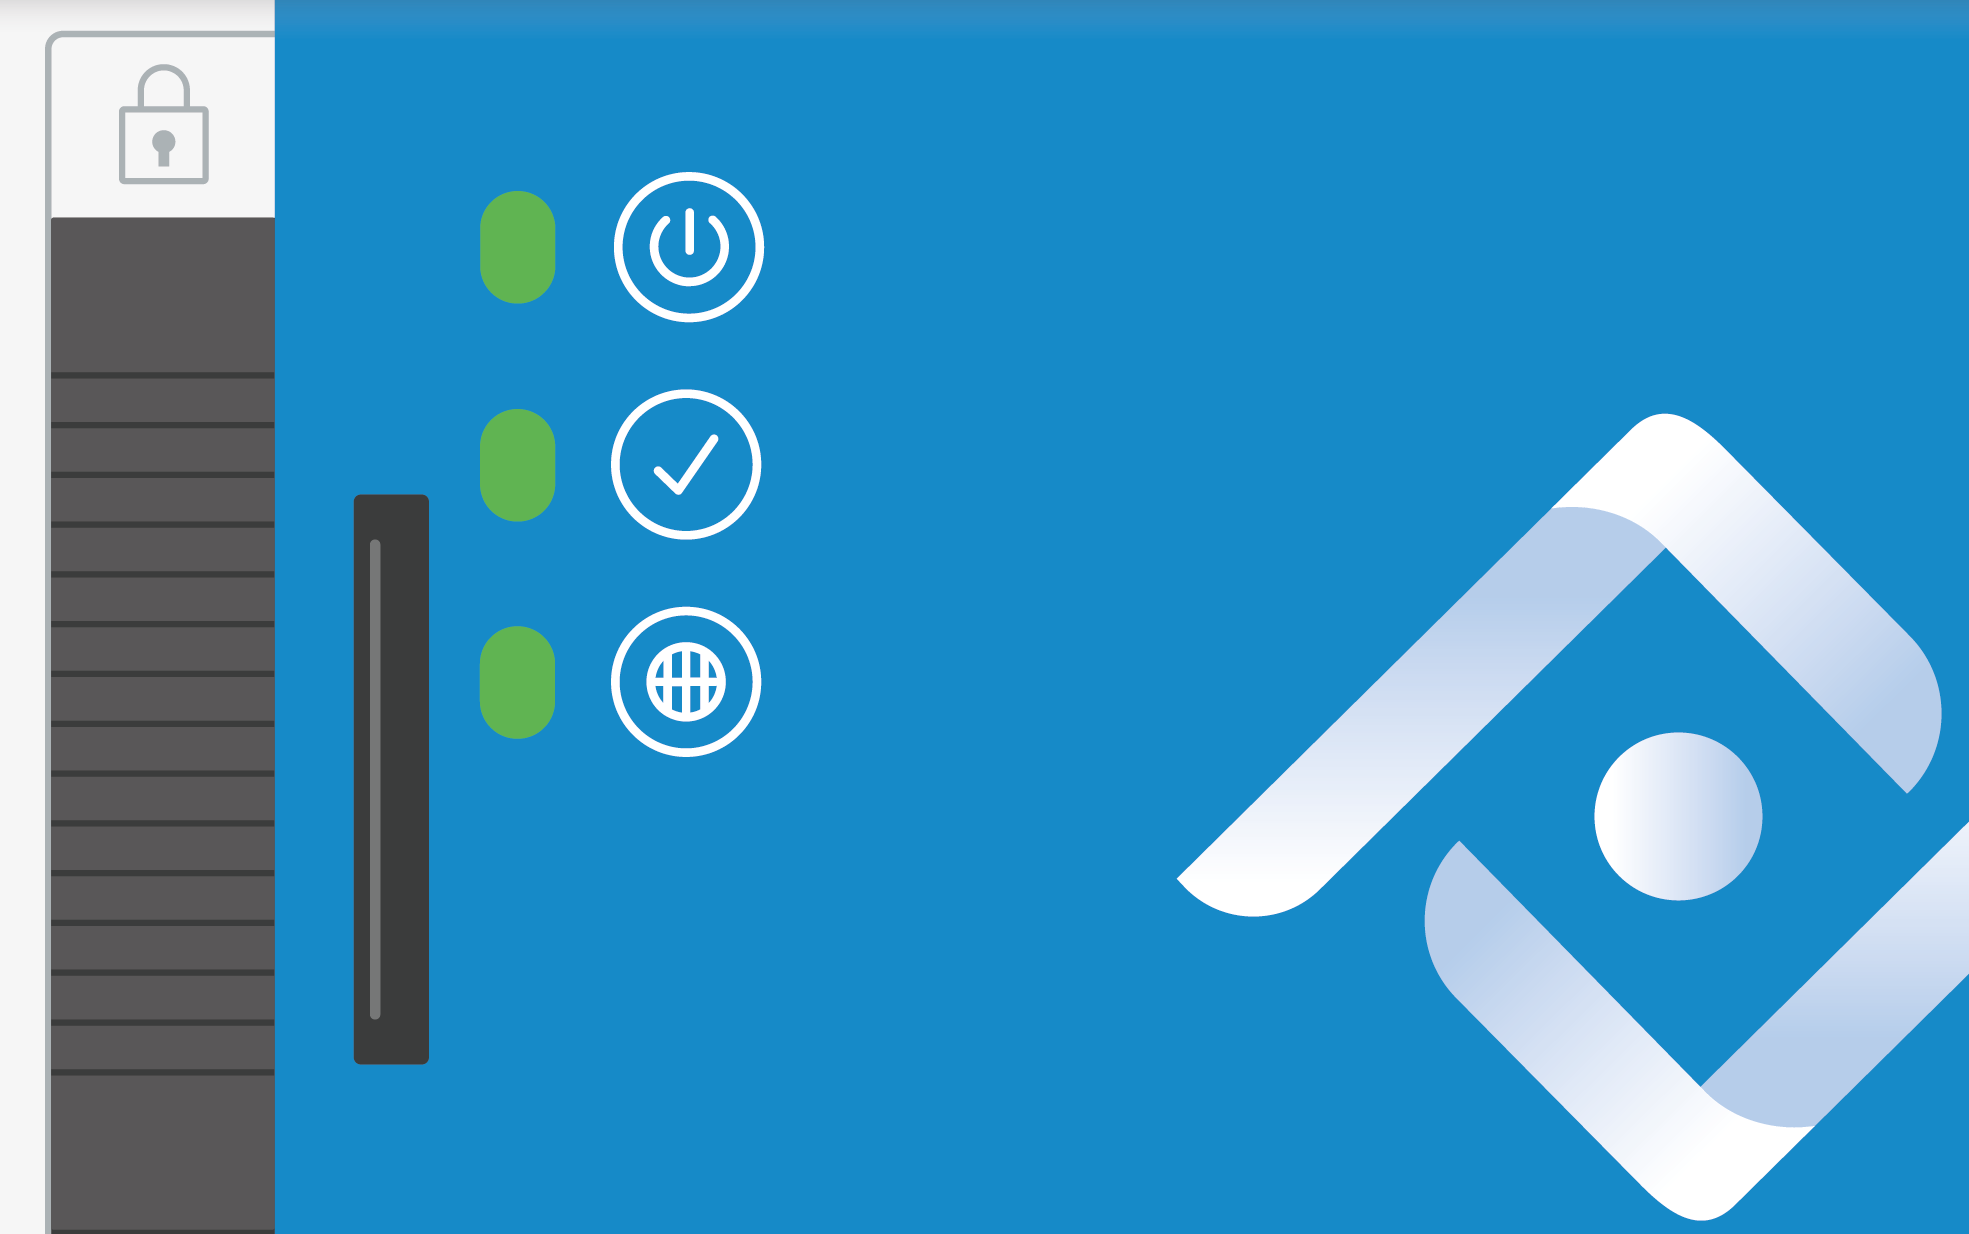
The LEDs light up as follows:
-


-


-

-
-
Wait for the
If the ![]()
![]()
Configure the bluelog in your network
A) With DHCP server
The IP address is assigned by the DHCP server.
Find the current IP address either in your personal network administration or in the web interface of the bluelog Neo in the next step.
B) Without DHCP server
The IP address is generated randomly by the bluelog.
Range: 169.254.XXX.XXX
Configure settings
Open web interface
Structure of bluelog’s host name:
-
DNS, Netbios:
https://blue-nnnnnnnn -
No DNS, Netbios:
https://blue-nnnnnnnn.local
n = last 8 digits of bluelog’s SN/serial number from the front panel
Register users and enable Support access
See Users.
Configure connected devices
See Devices
Further steps
Configure other settings that are relevant to your individual plant, e.g.: