Manage tickets
Last modified:
Create a ticket
Steps
In the Tickets portlet, select
 Create new ticket.
In the window that appears, give the ticket a Title and (optional) Description.
Select the relevant systems.
Select
 Create ticket.
The ticket will now appear in the Tickets portlet.Proceed to Add details to a ticket.
Create a ticket from an alarm
A ticket can be created from an individual alarm, or multiple alarms can be grouped into a ticket.
Prerequisites
At least one alarm is active.
Steps
In the Alarms portlet, select
 Create ticket next to the alarm for which you want to create a ticket. Alternatively, you can drag and drop an alarm to the Tickets portlet.
In the window that appears, give the ticket a Title and (optional) Description.
Select
Create ticket.
The ticket has now been created and is displayed in the Tickets portlet.Proceed to Add details to a ticket.
Group alarms into a single ticket
Group alarms into a single ticket to connect related alarms. For example, you might want to group all alarms for a system related to inverter failure.
Prerequisites
At least two alarms are active for the same system.
You have added the Alarms portlet.
Steps
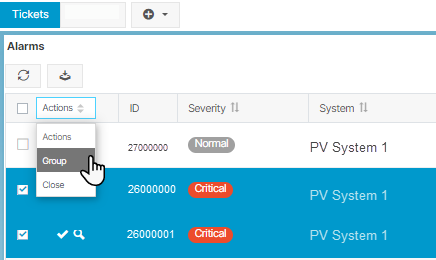
On the left-hand side of the Alarms portlet, tick the check boxes next to the alarms you want to group and select Group from the Actions dropdown. Alternatively, drag and drop multiple ticked alarms to the Tickets portlet.
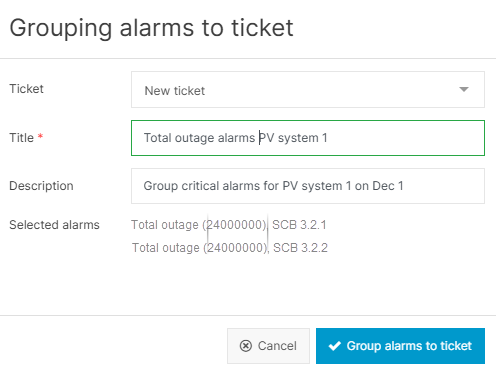
In the window that appears, select the Ticket type and give the ticket a Title and (optional) Description.
Select Group alarms to ticket.
The ticket has now been created and is displayed in the Tickets portlet.Proceed to Add details to a ticket.
Add details to a ticket
Prerequisites
A ticket already exists
Steps
In the Tickets portlet, select
 Edit next to the ticket title.
The Ticket details portlet will appear.
Edit details about the status and maintenance:
Ticket status
Priority
Person in charge
Technician deployed
Service partner
Edit the fault details:
Components: The components you select affect the System availability and Inverter availability calculations and charts
Affected power: Based on the selected components, you can calculate the power affected by this incident and its related tasks. This number is for information only and does not influence charts or calculations.
KPI EDITOR ONLY Exclude from PR and System availability calculations: Tick the check box to exclude this specific ticket from the calculations. See KPI editor for PR and system availability.
Edit details about the ticket cause. These may be relevant for PR, system availability, and OpenOffice reports (Ticket statistics variables, for example).