Last modified:
Manage various templates to use them on your asset’s dashboards.
Create a dashboard template
Prerequisites
-
You have created an organization.
-
You are the organization owner or an admin.
Steps
-
In platform view, select
-
Select +New template.
-
Give the dashboard template a Name and add a Description if desired.
-
Select Save and add widgets.
-
In the next window, select +Add widget and select the desired widget from the appearing overview. See also Types of dashboard widgets.
-
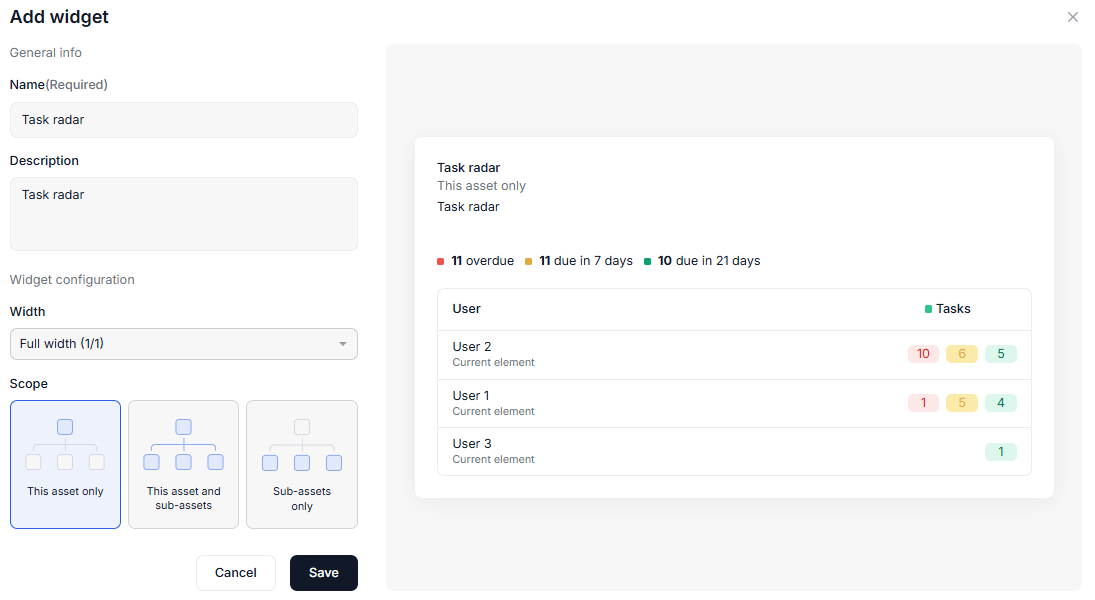
Depending on the widget you select, different settings may be required in the next window:
-
Enter the required specifications.
-
Select a Width from the dropdown. This adjusts how the widget’s size is displayed on the final dashboard and in reports.
-
Select the Scope that should apply when displaying the widget on the asset’s dashboard:
-
This asset only: Only data from the asset that is selected in the side bar is displayed.
-
This asset and sub-assets: Data from the selected asset in the side bar and all its sub-assets is displayed.
-
Sub-assets only: Only data from all sub-assets of the selected asset in the side bar is displayed, excluding the selected asset itself.
-
-
-
Select Save.
-
Add additional widgets to the dashboard template if desired.
-
Select Finish.
The template appears in the dashboard templates overview and you can select it when choosing a dashboard for an asset, see also Dashboard and widgets, or if you create a report template, see Reports and report templates.
Further actions
-
Hover over a dashboard template in the overview and select
-
-

-

-

-
-
Caution
Changes made to a dashboard template are propagated to all assets using that template.