VLAN
Last modified:
About VLAN and the blue’Log
Certain setups, such as control cabinets, require distinct communication networks for grid operators, devices, and the internet/WAN (wide area network). The blue'Log VLAN feature addresses this requirement. The feature uses virtual networks (VLANs) via a managed switch typically located within the control cabinet.
The blue'Log functions as a network bridge and uses VLANs to define routes for the networks.
Since the blue'Log has only one Ethernet port, physical network segmentation is handled by a managed switch where multiple VLANs are configured.
It is essential to match the blue'Log's VLAN configurations with those on the managed switch.
This configuration can also extend to the firewall settings.
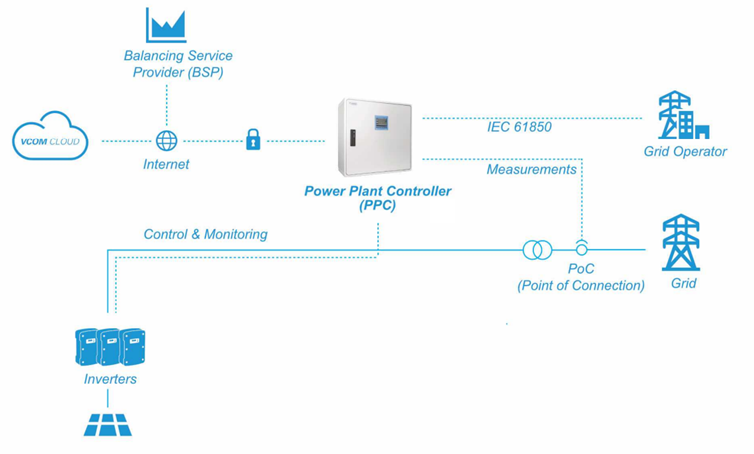
The graphic below shows how VLAN can be used to provide separate communication networks: the WAN (internet), the grid operator (compliant with IEC 61850), and the devices (control and monitoring)

Example of how VLAN can be used to provide separate communication networks
Set up a VLAN
Prerequisites
blue'Log XC or blue'Log XM
Firmware 28.0.2 or higher
Steps
Go to System > VLAN.
Select the Plus icon to add a new VLAN.
Fill in the mandatory fields:
VLAN ID (range 1-4094)
IP address
Subnet mask
Optional: Fill in if needed:
Default gateway
Primary DNS server
Secondary DNS server
Modify the MTU (Default: 1500).
Select the Disk icon to save.
If all settings are correct, a virtual LAN interface matching the VLAN settings will be created. All configured VLANs will be displayed in the list.
Optional: Adjust firewall settings if required.
Further actions
Edit or delete VLANs
To edit or delete a VLAN, use the options next to its name in the list.
For bulk actions, select multiple VLANs by ticking their checkboxes, or tick the checkbox in the table header to select all.
Use the Save, Cancel, and Delete buttons next to each VLAN to apply changes, but these only affect the specific row where they are selected.
.png)